
Have you ever looked at a beautiful drawing and thought, “I wish I could do that”? The truth is, you can. Learning how to draw isn’t about magic or talent—it’s a skill built on practice, observation, and understanding basic principles.
This guide will walk you through everything beginners need to know, from essential tools to fundamental techniques like shading, perspective, and proportion. By the end, you’ll feel confident picking up a pencil and creating your own artwork, whether it’s realistic portraits, whimsical cartoons, or meditative sketches.
Why Learning to Draw is a Skill, Not a Magic Trick
Drawing is primarily about learning to see. Your brain wants to simplify objects into symbols—a smiley face for a human, a circle for an apple—but great drawings start with observing the true shapes, lines, and shadows.
Tip: Embrace mistakes—they are your best teachers. Every master artist was once a beginner. Focus on the process, not perfection.
Gathering Your Essential Drawing Tools
You don’t need a professional studio to start. A simple, well-chosen set of tools is enough:
- Pencils: Graphite pencils in HB (medium), 2B (soft), and 2H (hard) cover most beginner needs.
- Erasers: Kneaded erasers for precise lifting and vinyl erasers for full corrections.
- Paper: Sketchbook paper (~100 lb / 160 gsm) has the right texture for graphite.
- Sharpener: A reliable manual sharpener or craft knife to maintain pencil points.
Pro Tip: Invest in mid-range tools. Cheap supplies can be frustrating and affect your progress.
The Fundamental Building Blocks: Shape and Form
Every object can be broken down into basic shapes. Seeing these underlying forms makes complex subjects easier to draw.
Exercise: Draw a simple mug:
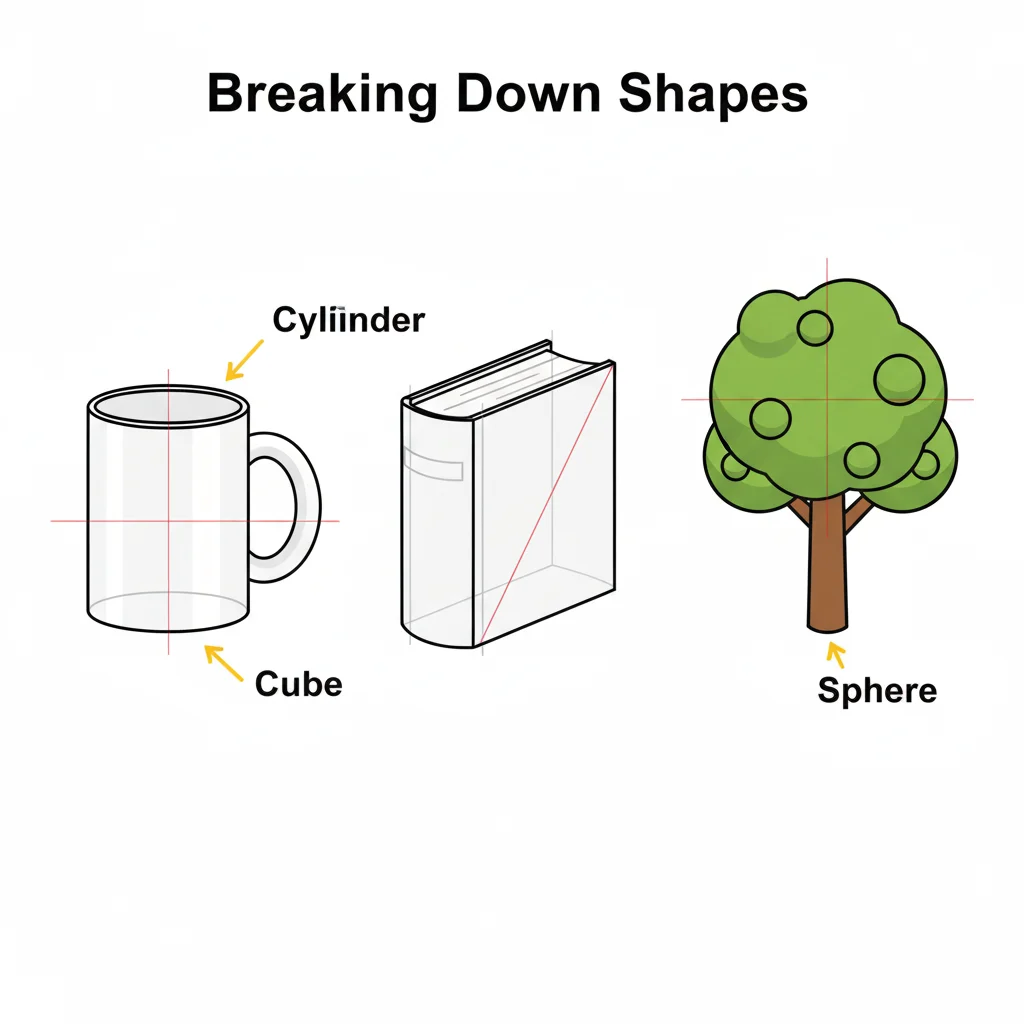
- Identify the basic shapes: cylinder for the body, curved rectangle for the handle.
- Lightly sketch these shapes.
- Refine lines, softening corners and connecting shapes for the final outline.
Repeat with everyday objects: a house (cube + triangle), a book (rectangular prism), a tree (cylinder + cloud-like foliage).
Tip: Constructive drawing is the foundation of all representational art.
Mastering 5 Essential Drawing Techniques
1. Contour Drawing: Train Eye-Hand Coordination
- Blind Contour: Look only at the object, not your paper. Your lines may look abstract, but your observation improves.
- Pure Contour: You can glance at your paper, but the focus is still on carefully following the object’s edges.
Tip: Don’t aim for perfection—accuracy comes with practice.
2. Light and Shadow: Create 3D Illusions
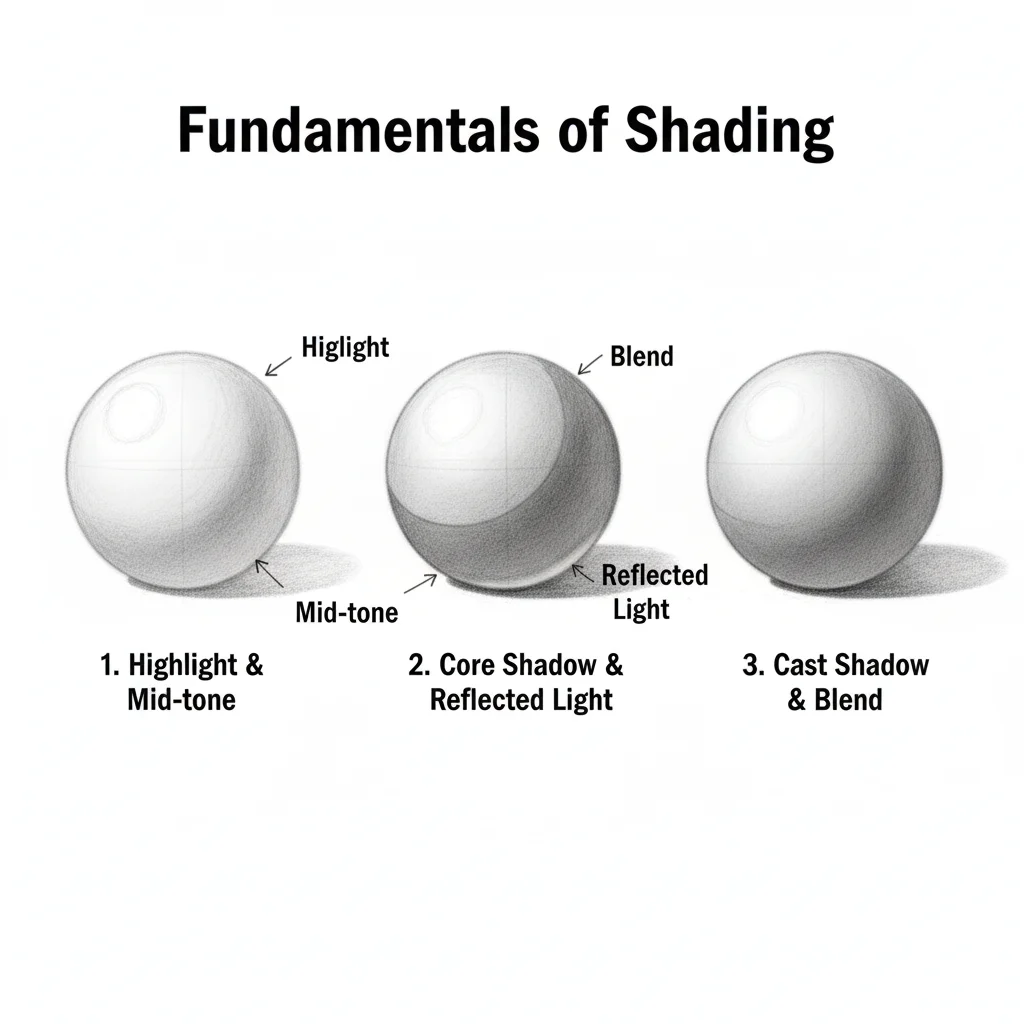
- Highlight: Brightest spot where light hits.
- Mid-Tones: Base tone transitioning from light to dark.
- Core Shadow: Deepest shadow on the object.
- Cast Shadow: Shadow the object casts on surrounding surfaces.
Exercise: Shade a simple sphere. Gradually build up darkness, blending smoothly for realistic form.
Warning: Over-blending can make drawings muddy—layer lightly and patiently.
3. Perspective: Add Depth
- One-Point Perspective: Lines converge at a single vanishing point (perfect for roads, corridors).
- Two-Point Perspective: Lines converge at two points (ideal for buildings or corners).
Tip: Mastering perspective makes scenes believable and dynamic.
4. Proportion: Get Sizes Right
- Use a pencil as a measuring tool at arm’s length.
- Compare relative sizes: eyes, nose, mouth, limbs.
Pro Tip: Slight asymmetry makes drawings more natural—avoid overly perfect symmetry.
5. Texture: Bring Your Drawing to Life
- Smooth: Blended graphite with gradual shading.
- Rough: Small, irregular marks or stippling.
- Furry: Many soft overlapping lines following the direction of fur growth.
Step-by-Step Drawing Exercise: An Apple
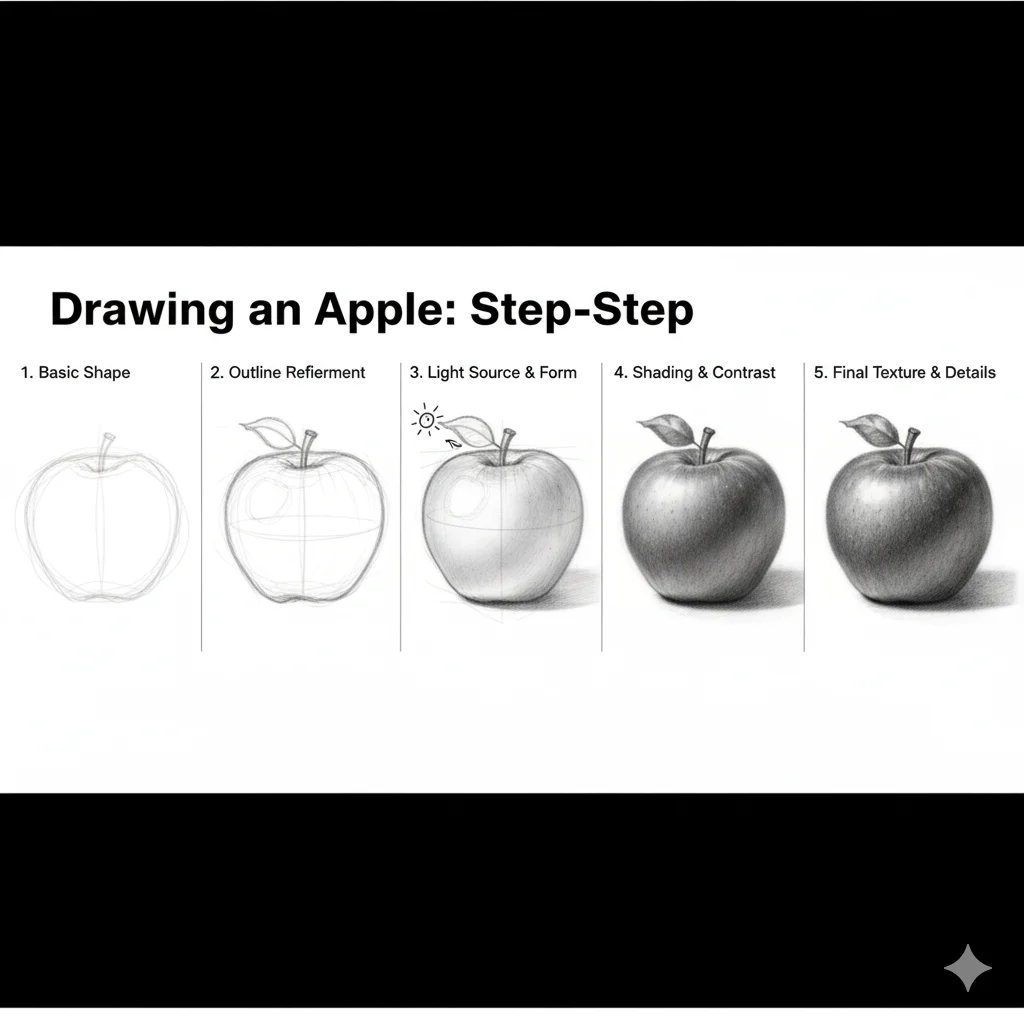
- Basic Shape: Lightly sketch an oval or slightly lopsided circle.
- Refine Outline: Add small dips for stem, refine curves.
- Identify Light Source: Choose the direction light hits.
- Block Shadows: Lightly shade areas opposite the light.
- Build Tones & Blend: Layer graphite for depth; smooth transitions.
- Add Details: Stem, subtle textures, and enhance darkest shadows for contrast.
Frequently Asked Questions (FAQs)
Q1: Can I learn to draw without talent?
A: Absolutely! Drawing is learned through practice, observation, and applying principles.
Q2: How often should I practice?
A: Short, consistent daily sessions (15–20 minutes) are more effective than occasional long sessions.
Q3: What should beginners draw first?
A: Simple objects: cups, keys, fruit, or your hand. Focus on basic shapes.
Q4: What if I get frustrated?
A: Take a break, identify the problem, and practice exercises targeting that skill.
Q5: When can I start using color?
A: Focus on mastering graphite first. Understanding value and form makes colored work more effective.
Final Thoughts: Start Your Artistic Journey
Drawing is about patience, observation, and joy in creation. Focus on shapes, light, proportion, and practice consistently. Your tools are simple, but your potential is limitless.
CTA: Pick up your pencil, open your sketchbook, and make your first mark today.