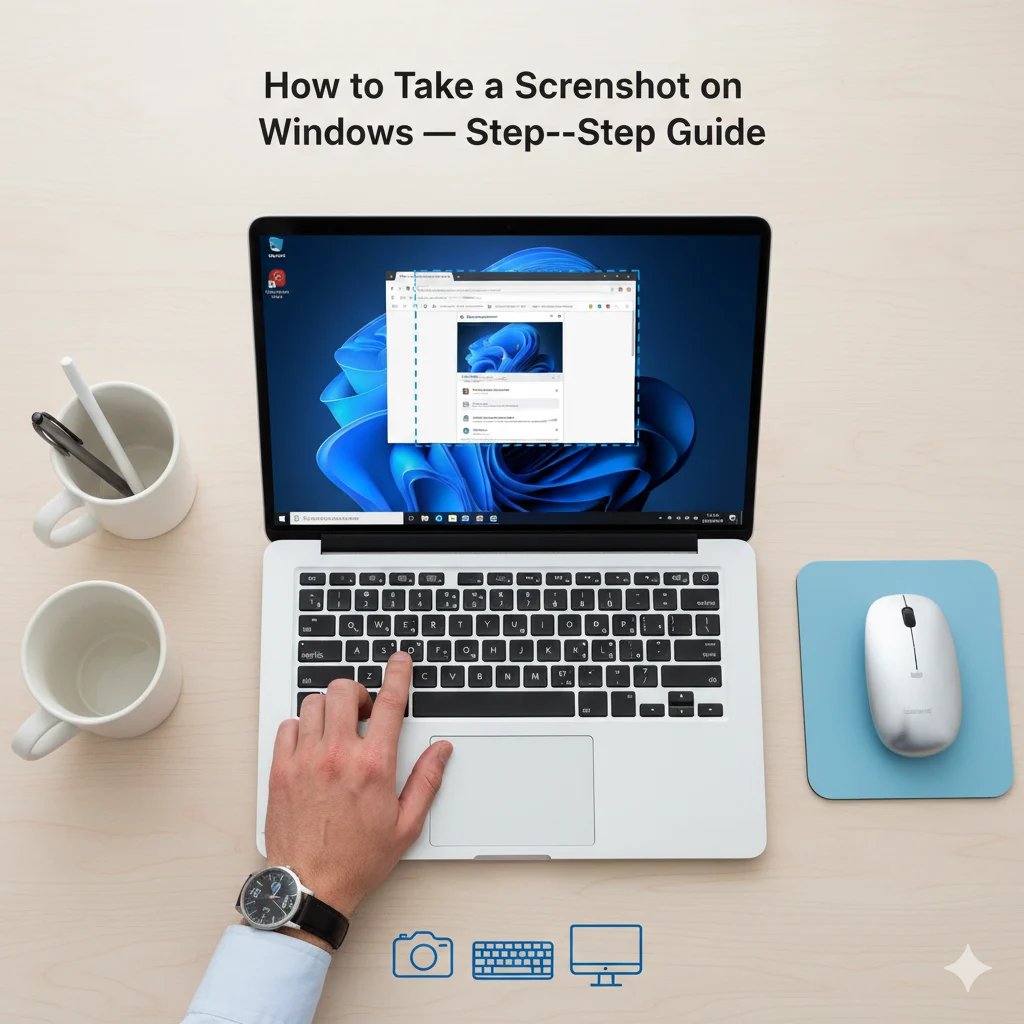
Capturing exactly what’s on your screen is an essential skill for everyone, whether you’re saving a receipt, troubleshooting an error message, or sharing a memorable conversation. Knowing how to take a screenshot on Windows is quick, easy, and incredibly useful. This step-by-step guide will walk you through all the built-in methods, from simple keyboard shortcuts to powerful editing tools. You’ll learn how to capture your entire screen, a single window, or a custom-selected area, and then save, annotate, and share it effortlessly. Let’s dive into the various ways you can become a screenshot pro on both Windows 10 and Windows 11.
Written by a certified IT professional and tech writer with over a decade of experience in creating clear, user-friendly guides.
Step 1: Use the Print Screen (PrtScn) Key for a Full Screen Capture
The most well-known method is using the Print Screen key, usually labeled PrtScn or similar. A single press captures an image of your entire screen. However, it doesn’t save a file automatically. Instead, it copies the image to your clipboard. To use it, simply press the PrtScn key. Then, open an application like Paint, Microsoft Word, or an email, and paste (Ctrl+V) the screenshot to view, edit, or share it. This method is perfect for a quick, one-time capture you plan to use immediately.
Pro Tip: On many laptops, you may need to hold the Function (Fn) key and then press PrtScn for it to work correctly.

Step 2: Save a Screenshot Instantly with Windows Key + Print Screen
For those who want to capture and save a file without any extra steps, this shortcut is your best friend. Press the Windows logo key + PrtScn simultaneously. Your screen will dim briefly to indicate a successful capture. Windows automatically saves the screenshot as a PNG file in the Screenshots folder inside your Pictures library. This is the most efficient method when you need a permanent record of your screen and don’t require immediate editing.
Step 3: Capture Only the Active Window with Alt + Print Screen
If you only need a picture of the specific program you’re using—like a browser window or a dialog box—this shortcut saves time on cropping. Click on the window you want to capture to make it “active.” Then, press Alt + PrtScn. Just like the basic Print Screen method, this copies the image of the active window to your clipboard. You can then paste it into any supporting application. This method helps keep your screenshots clean and focused on the relevant content.
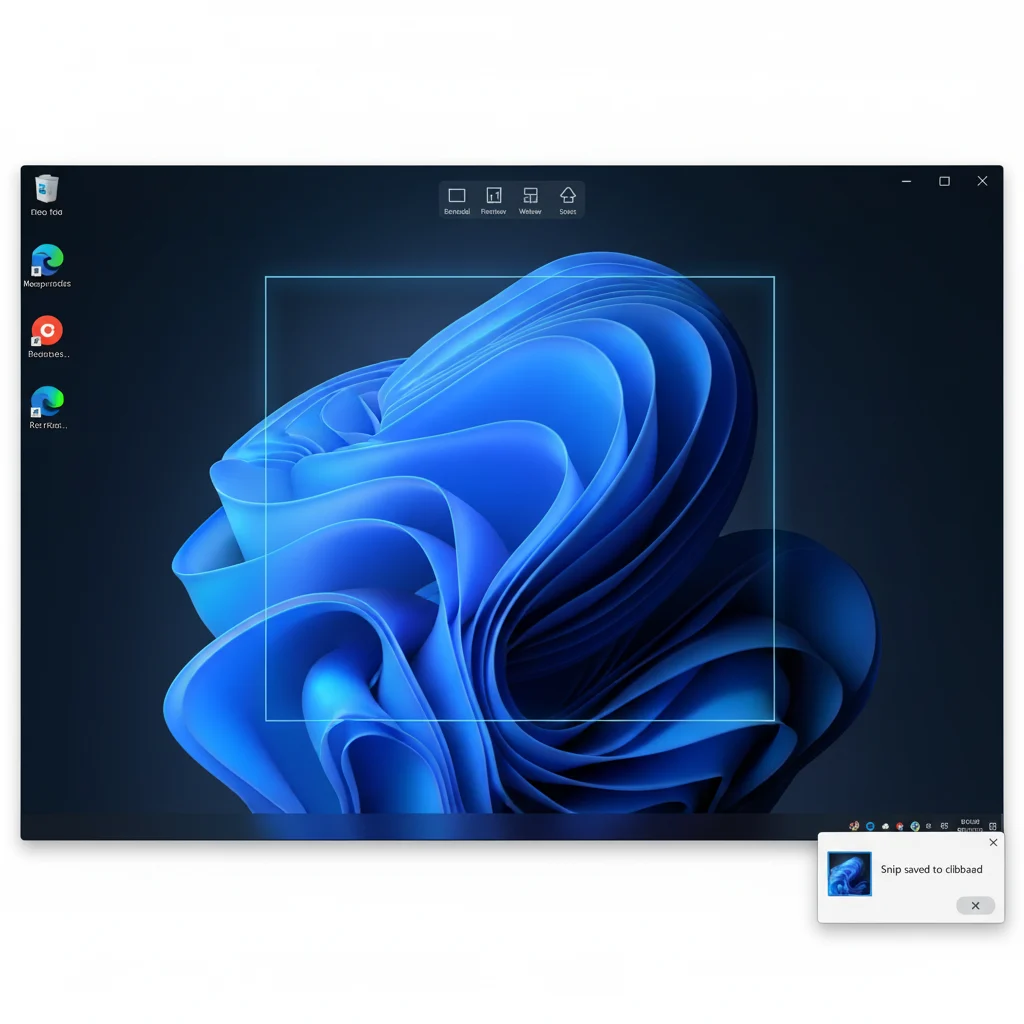
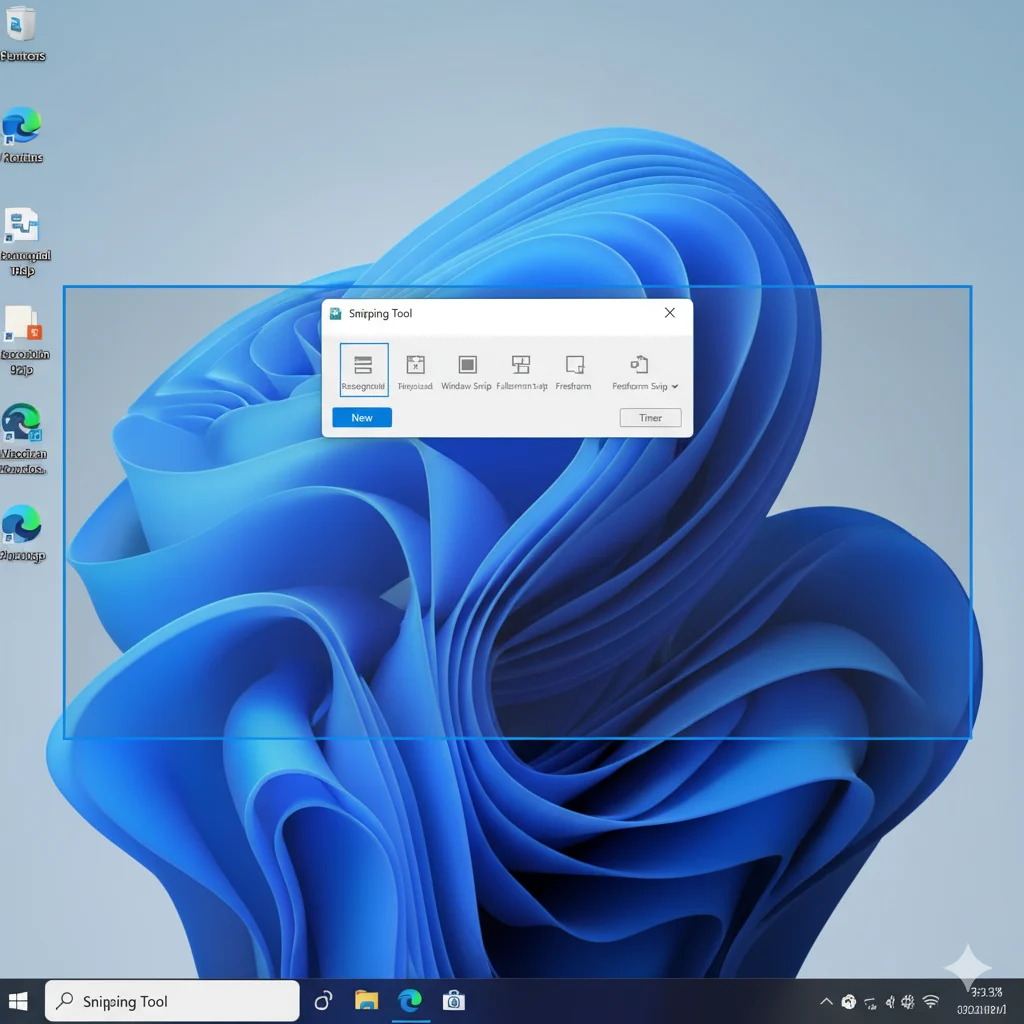
Step 4: Harness the Power of the Snipping Tool (Windows 11) and Snip & Sketch
Windows includes a dedicated, versatile tool for screenshots. In Windows 11, it’s simply called the Snipping Tool. In Windows 10, the modern version is called Snip & Sketch (you can launch it with Windows Key + Shift + S). Open the Snipping Tool from your Start Menu and click New. You can then choose from several modes: Rectangular Snip, Freeform Snip, Window Snip, or Fullscreen Snip. After capturing, the screenshot opens in an editor where you can annotate, crop, and save it.
Why we recommend this: It offers the most control over what you capture and includes basic editing tools in one place.
Step 5: Take a Timed Screenshot with the Snipping Tool
A unique feature of the Snipping Tool is its ability to take a delayed screenshot. This is incredibly useful for capturing context menus or tooltips that disappear when you click elsewhere. Open the Snipping Tool, click the delay button (e.g., “3 seconds” or “10 seconds”), and then hit New. Set up your screen exactly how you want it—like opening a menu—and the tool will capture it automatically after the timer counts down. This solves the common problem of menus vanishing before you can screenshot them.
Step 6: Use the Game Bar for Screenshots in Apps and Games
Designed for gamers but useful for anyone using an app in full-screen mode, the Game Bar is a handy overlay. Press Windows Key + G to open the Game Bar. You can then click the camera icon or use the keyboard shortcut Windows Key + Alt + PrtScn to take a full-screen screenshot. By default, these screenshots are saved to the Captures folder within your Videos library. This method is reliable when other tools might not work in full-screen applications.
Visual Guide: See How It’s Done
*(Image Suggestion: A simple infographic placed here showing a keyboard with the four main shortcuts highlighted: 1. PrtScn, 2. Win + PrtScn, 3. Alt + PrtScn, 4. Win + Shift + S. Each shortcut has a small icon next to it showing the type of capture it performs.)*
Pro Tips for Mastering Windows Screenshots
- Change the Default File Format: The Snipping Tool allows you to save in JPG, PNG, or GIF format. PNG is best for quality and text clarity, while JPG is better for photos to save space.
- Enable Clipboard History: Press
Windows Key + Vto enable and access your clipboard history. This lets you paste the last several items you copied, including multiple screenshots. - Annotate for Clarity: Use the pen and highlighter tools in the Snipping Tool to draw attention to specific parts of your screenshot before sharing it.
- Pin Snips to Screen: In the Snipping Tool, use the “Pin to screen” button to keep your screenshot always on top of other windows—great for referencing information.
Troubleshooting: When Screenshots Don’t Work as Expected
- Issue: Print Screen key does nothing.
- Fix: Some keyboards require you to press a Function Lock (F Lock) key or use the
Fn + PrtScncombination. Also, check your keyboard settings in Windows Settings > Accessibility > Keyboard to ensure “Print Screen shortcut” is enabled.
- Fix: Some keyboards require you to press a Function Lock (F Lock) key or use the
- Issue: Screenshots are saved to the wrong folder.
- Fix: When you use
Windows + PrtScn, files go toPictures > Screenshots. For the Game Bar, it’sVideos > Captures. You can open the folder and move the files, or change the save location in the Game Bar settings.
- Fix: When you use
- Issue: The Snipping Tool is missing or won’t open.
- Fix: You can likely reinstall it from the Microsoft Store. Alternatively, use the universal
Windows Key + Shift + Skeyboard shortcut, which will open the snipping interface even if the app itself has an issue.
- Fix: You can likely reinstall it from the Microsoft Store. Alternatively, use the universal
Conclusion
As you can see, learning how to take a screenshot on Windows is a straightforward process with multiple methods to suit any situation. From the quick PrtScn key for a full-screen grab to the precise and editable Snipping Tool, you now have the knowledge to capture anything on your display. Start practicing these techniques today to save time, communicate more clearly, and make the most of your Windows computer. It’s a simple skill that will pay dividends in your daily digital life.
Frequently Asked Questions (FAQ)
Where do my screenshots go when I press Windows + Print Screen?
They are automatically saved as PNG files in your Pictures library, inside a folder named Screenshots. You can find this folder quickly by typing Screenshots into the File Explorer address bar.
How do I take a screenshot on Windows without a Print Screen button?
If your keyboard lacks a PrtScn key, use the Snipping Tool. You can also press Windows Key + Shift + S to activate the snipping bar instantly. For a full-screen capture, use the Game Bar by pressing Windows Key + G and then the camera icon.
What is the difference between the Snipping Tool and Snip & Sketch?
In Windows 11, the Snipping Tool has absorbed all the features of Snip & Sketch. In Windows 10, Snip & Sketch is the newer, recommended tool (activated with Win + Shift + S), while the legacy Snipping Tool is simpler but less feature-rich.
How can I edit a screenshot after I take it?
The Snipping Tool has built-in editing tools like pen, highlighter, and eraser. For more advanced edits, you can paste any clipboard screenshot (PrtScn or Alt + PrtScn) into Paint, Paint 3D, or Photoshop for cropping, resizing, and more.
Can I take a screenshot on both Windows 10 and Windows 11 using these methods?
Yes, absolutely. All the methods covered in this guide—PrtScn, Win + PrtScn, Alt + PrtScn, and Win + Shift + S—work on both Windows 10 and Windows 11. The primary difference is the name and slight interface of the dedicated Snipping Tool app.