
Screenshots are a vital tool for work, study, or personal use. Whether you want to save an online receipt, share a game moment, or report a software bug, knowing how to take a screenshot on Windows is essential.
Windows offers multiple methods, from keyboard shortcuts to built-in tools like Snipping Tool and Snip & Sketch, as well as third-party apps. This guide will walk beginners through all the methods, tips, common mistakes, and FAQs to make capturing your screen effortless.
Why Screenshots Are Important
Screenshots are more than just images—they are powerful tools for communication and record-keeping:
- Quick Sharing: Show exactly what’s on your screen.
- Documentation: Save receipts, tickets, and proof of work.
- Troubleshooting: Share errors or bugs with tech support.
- Learning & Notes: Capture charts, diagrams, or study materials.
Pro Tip: Knowing multiple screenshot methods ensures you can capture anything efficiently.
Method 1: Using Keyboard Shortcuts
Windows has built-in shortcuts for fast screenshots:
1. Print Screen (PrtScn)
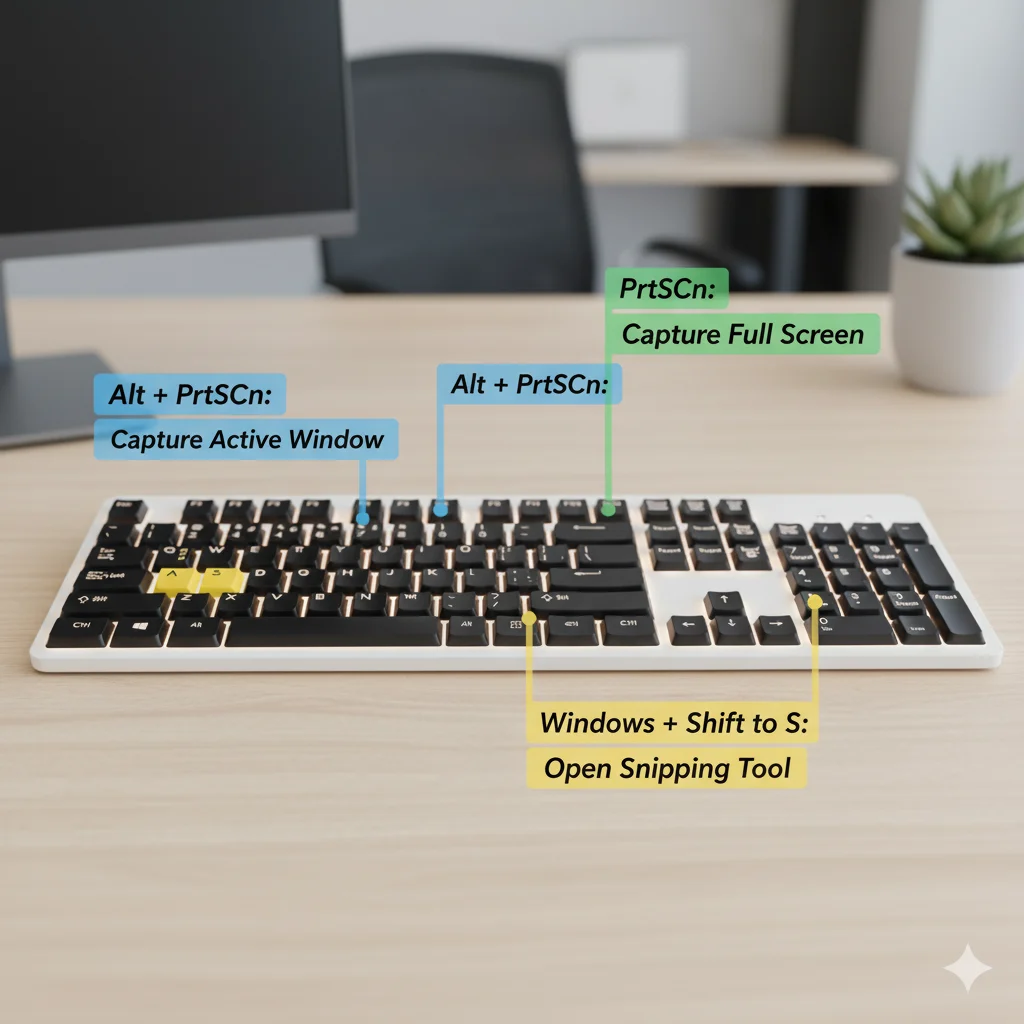
- Press PrtScn to copy the entire screen to the clipboard.
- Open Paint or another image editor and press Ctrl + V to paste.
- Save as PNG or JPG.
2. Windows + PrtScn
- Captures the full screen and automatically saves the screenshot in the Screenshots folder under Pictures.
3. Alt + PrtScn
- Captures only the active window.
- Paste in any editor and save.
Tip: Use Alt + Tab to select the window you want before pressing Alt + PrtScn.
Method 2: Using Snipping Tool
The Snipping Tool allows flexible, precise screenshots:
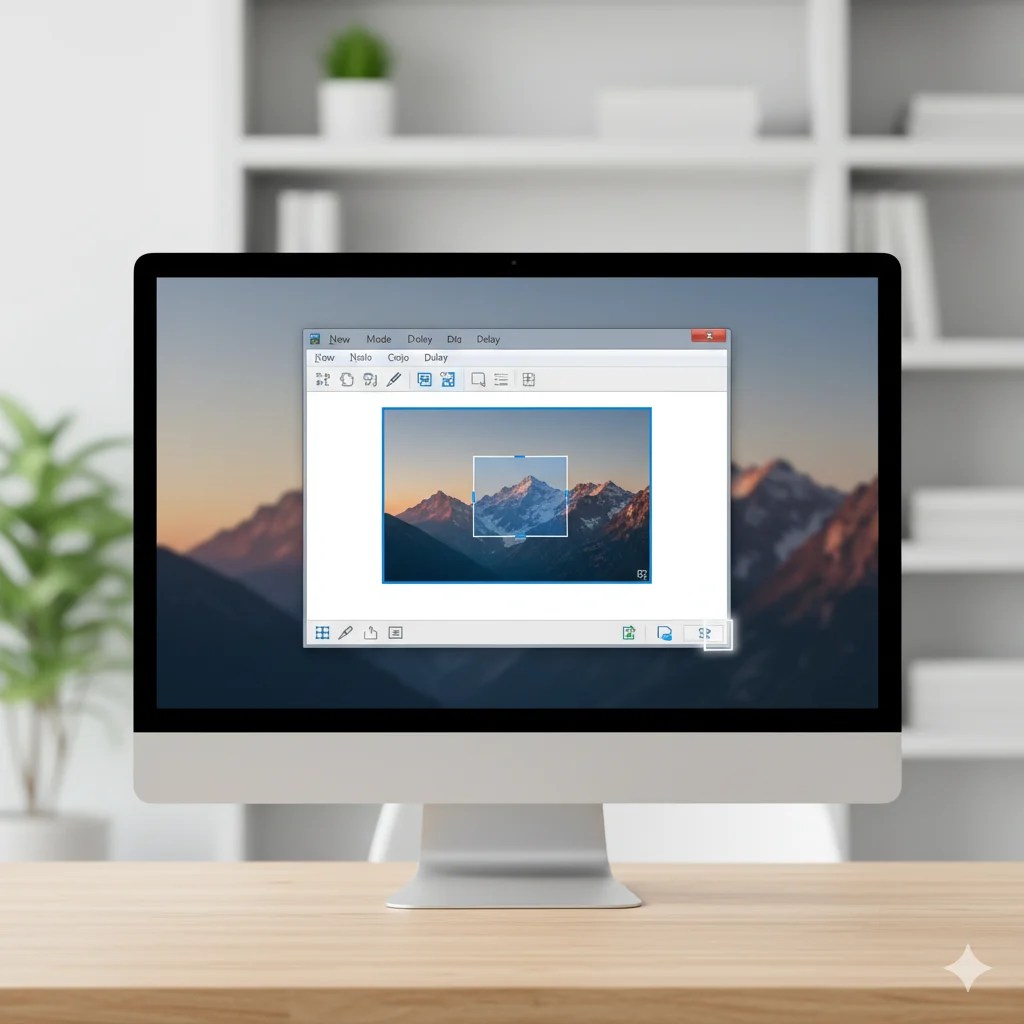
- Open Start → Snipping Tool.
- Click New and choose:
- Free-form: Draw any shape.
- Rectangular: Drag a rectangle.
- Window: Capture a specific window.
- Full-screen: Capture everything.
- Annotate with pen or highlighter.
- Save via File → Save As.
Pro Tip: Use delayed snips to capture menus or pop-ups.
Method 3: Using Snip & Sketch (Windows 10/11)
Snip & Sketch is the upgraded version of Snipping Tool:
- Press Windows + Shift + S to open the snipping toolbar.
- Choose Rectangular, Freeform, Window, or Fullscreen.
- Screenshot is copied to clipboard; click the notification to edit and save.
Tip: Annotate immediately using built-in pens and crop tools for clarity.
Method 4: Using Game Bar
Perfect for gamers or full-screen apps:
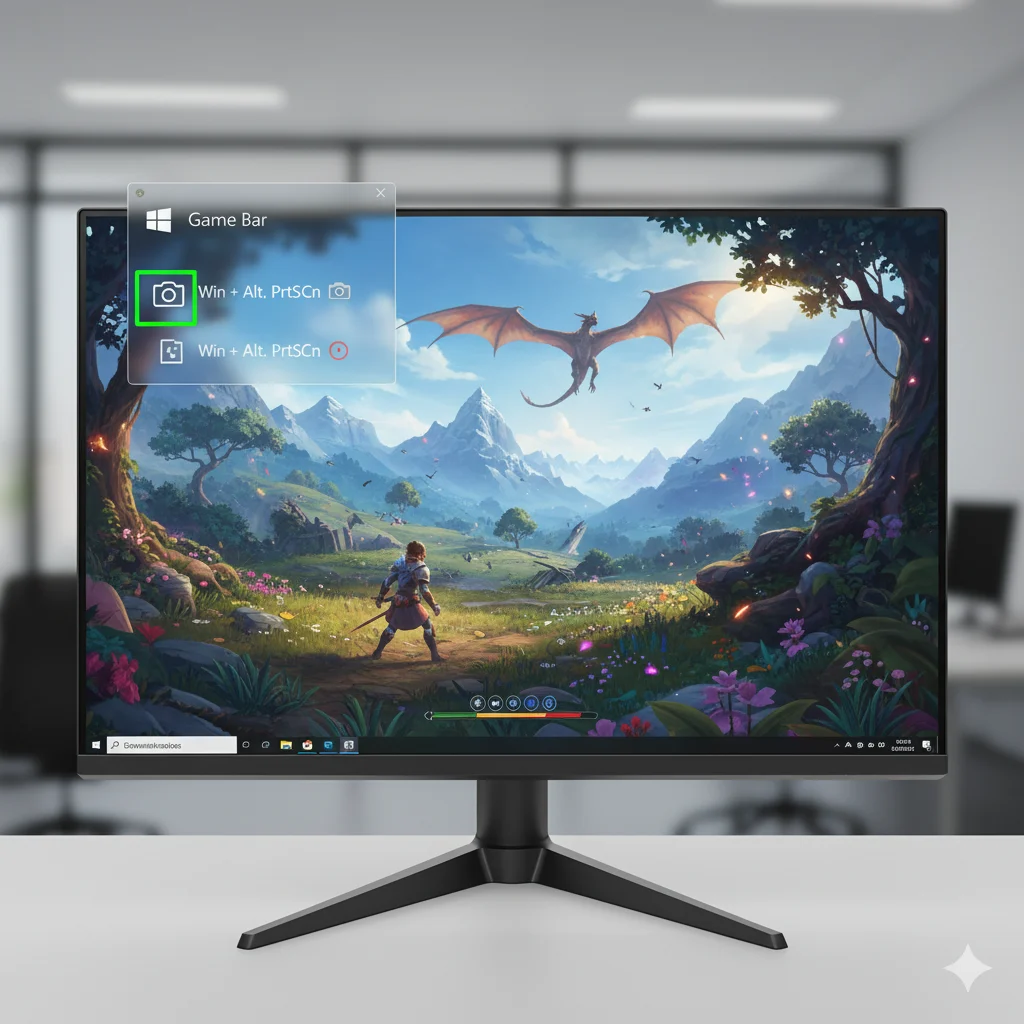
- Press Windows + G to open Xbox Game Bar.
- Click the camera icon or press Windows + Alt + PrtScn.
- Screenshots are saved in Videos → Captures.
Tip: Game Bar captures in high-quality PNG format.
Method 5: Using Third-Party Tools
For advanced features:
- Lightshot: Simple, fast, cloud sharing, annotation.
- Greenshot: Region capture, export, basic editing.
- ShareX: Full-featured, scrolling capture, screen recording, automation.
Pro Tip: Use third-party apps for scrolling windows, GIFs, or professional tutorial screenshots.
Editing and Saving Screenshots
After capturing:
- Open in Paint, Paint 3D, or Photoshop.
- Crop, annotate, or resize as needed.
- Save in PNG (sharp lines/text) or JPG (photos, smaller size).
Tip: Organize screenshots in folders with descriptive names to avoid clutter.
Common Mistakes and How to Avoid Them
- Forgetting to save clipboard screenshots.
- Capturing the wrong window.
- Relying only on one method—some apps require different approaches.
- Ignoring file organization.
Mini-Tip Box: Keep a quick-reference cheat sheet of shortcuts and tools near your workspace.
Frequently Asked Questions (FAQs)
Q1: Can I take a screenshot automatically without pasting?
A: Yes, press Windows + PrtScn.
Q2: How do I capture dropdown menus or pop-ups?
A: Use delayed capture in Snipping Tool or Snip & Sketch.
Q3: Can I take scrolling screenshots?
A: Not natively. Use ShareX or browser extensions.
Q4: What’s the best format?
A: PNG for UI/text, JPG for photos.
Q5: Can I annotate without third-party apps?
A: Yes, Snipping Tool and Snip & Sketch have built-in tools.
Conclusion
Learning how to take a screenshot on Windows is simple but extremely useful. From keyboard shortcuts to built-in apps and third-party tools, you can capture, edit, and share your screen efficiently.
CTA: Practice these methods to capture screens quickly, save files organized, and share with confidence!