Wearing a tie might seem simple, but tying it perfectly requires skill. Whether for school events, weddings, job interviews, or professional meetings, knowing how to tie a tie correctly boosts confidence and appearance. This guide is for students, first-timers, professionals, and anyone attending casual or formal events. You’ll find step-by-step instructions, knot variations, collar matching tips, common mistakes, FAQs, and style advice—all in one comprehensive article.
Why Learning to Tie a Tie Still Matters
Even in a casual-dress world, a neat tie symbolizes professionalism and style.
- First impressions count: A well-tied tie shows attention to detail and confidence.
- Dress codes remain relevant: Many schools, offices, and events still require ties.
- Boosts confidence: Being able to tie your own tie is empowering.
- Versatility: Different knots suit different collars, fabrics, and occasions.
This article saves you time and confusion by providing everything in one place.
Choosing the Right Knot for Your Occasion
| Knot | Best For | Collar Type | Occasion |
|---|---|---|---|
| Four-in-Hand | Beginners, students | Narrow, button-down | Casual, school uniforms |
| Half Windsor | Professionals, semi-formal | Standard | Interviews, office, semi-formal events |
| Full Windsor | Formal, symmetrical | Spread, cutaway | Weddings, ceremonies, business events |
Four-in-Hand Knot — Quick and Simple
The Four-in-Hand is narrow, slightly asymmetrical, and easy to tie, making it perfect for beginners or casual wear.
Steps:
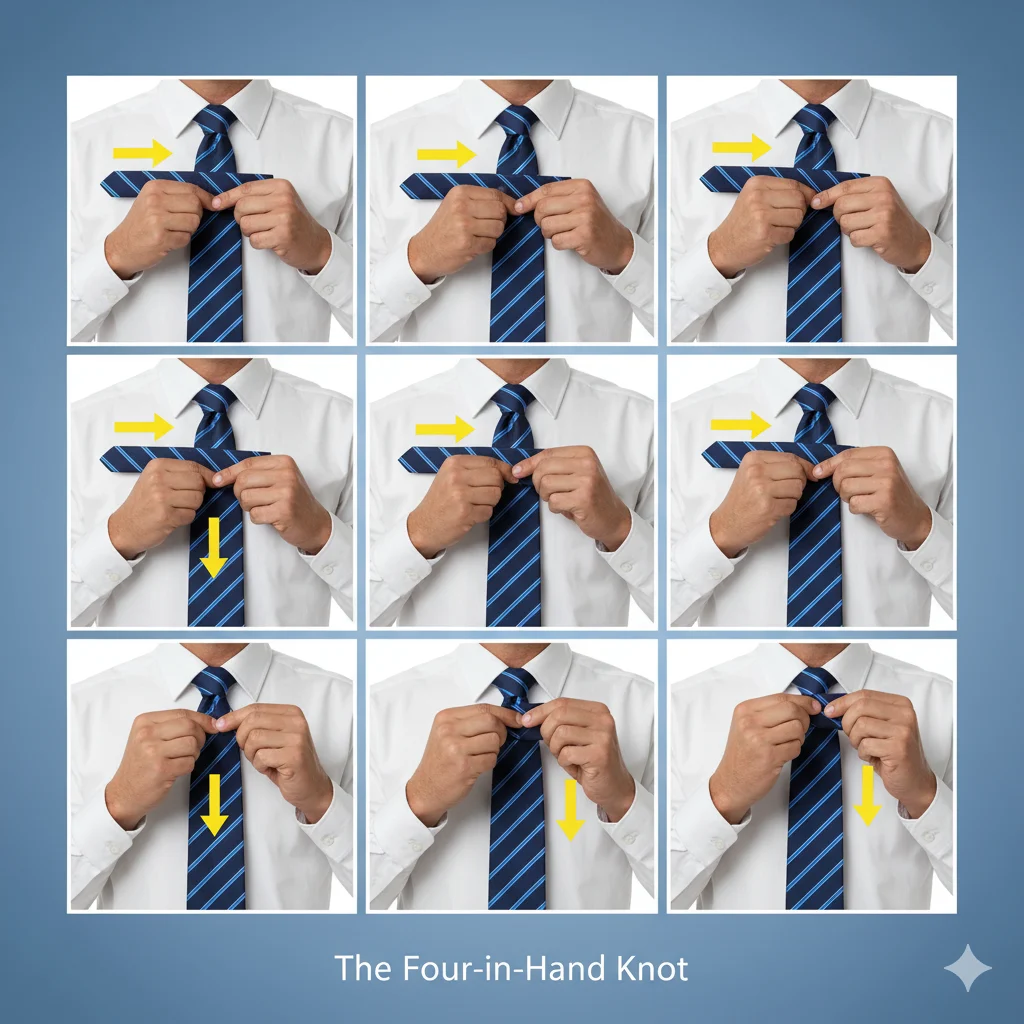
- Place the tie around your neck, wide end longer.
- Cross the wide end over the narrow end.
- Bring the wide end behind the narrow end.
- Wrap it across the front.
- Pull it up through the neck loop.
- Slide it down through the front loop.
- Adjust the knot neatly and center it.
Tips:
- Ideal for school uniforms and casual events.
- Add a dimple by pinching the fabric just below the knot while tightening.
Half Windsor Knot — Balanced and Professional
The Half Windsor is symmetrical and medium-sized, perfect for interviews, office settings, or semi-formal events.
Steps:
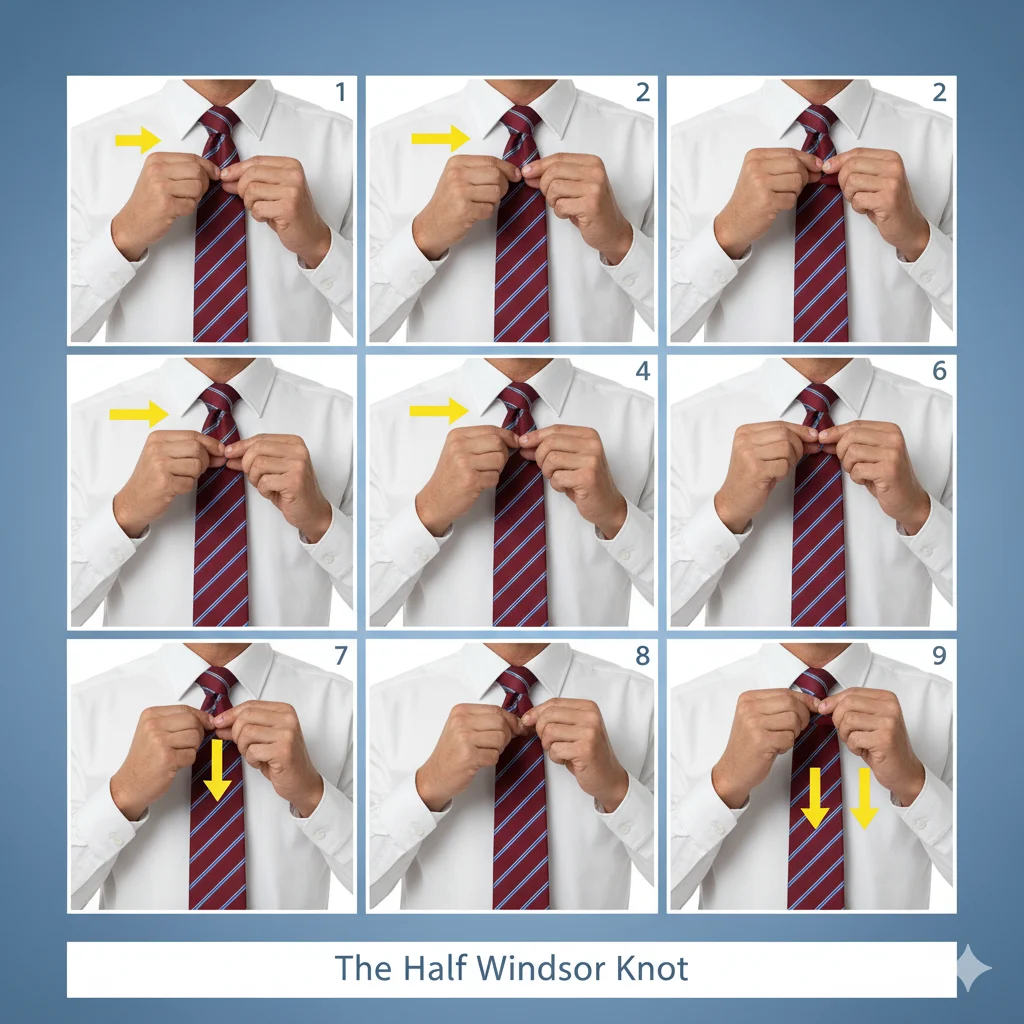
- Drape the tie with the wide end longer.
- Cross the wide end over the narrow end.
- Pull it up through the neck opening and down.
- Wrap it behind the narrow end.
- Bring it across the front.
- Pull it up through the neck loop again.
- Pass it through the front loop and tighten.
Tips:
- Works well with medium-width ties and classic collars.
- Provides a polished and professional appearance.
Full Windsor Knot — Formal and Symmetrical
The Full Windsor is wide, triangular, and formal, ideal for weddings, business meetings, or ceremonial occasions.
Steps:
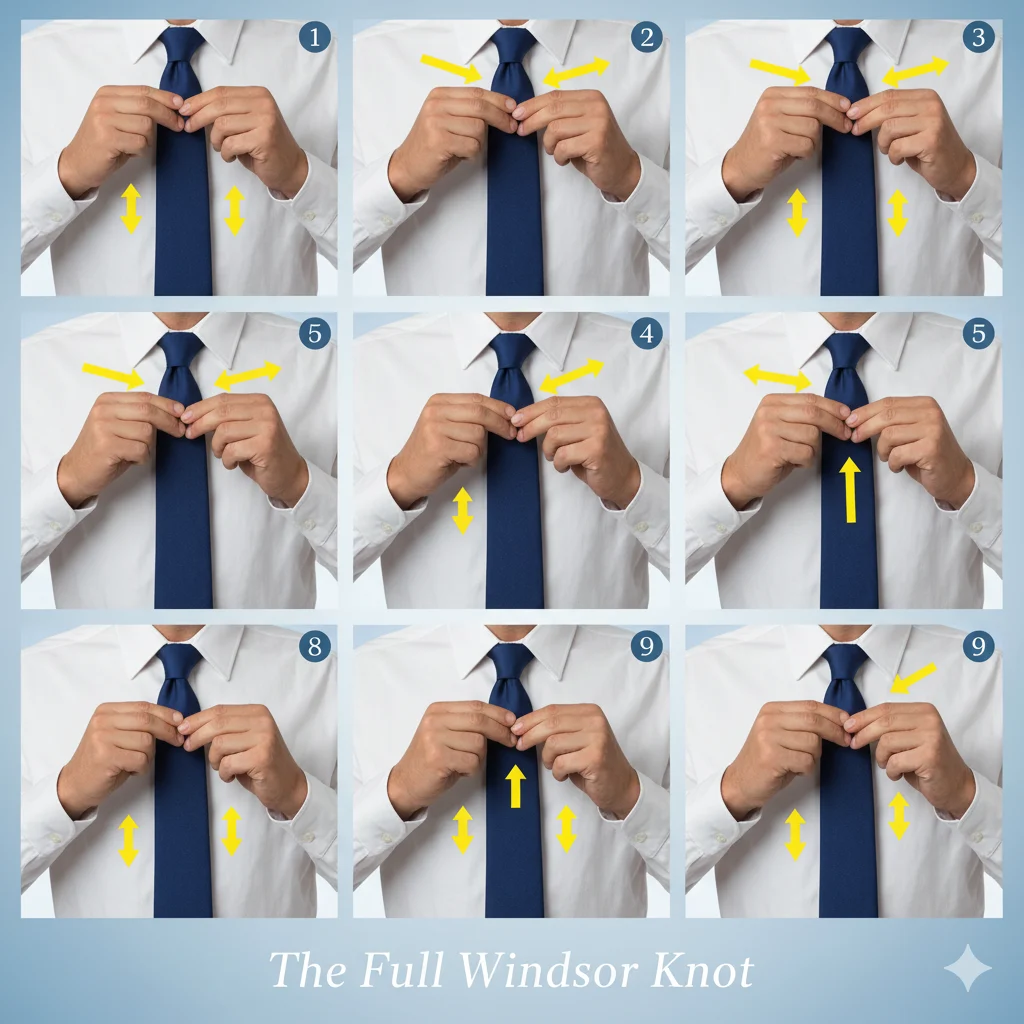
- Place the tie around your neck, wide end much longer.
- Cross the wide end over the narrow end.
- Pull it up through the neck loop and back down.
- Wrap it behind the narrow end to the opposite side.
- Bring it up through the neck loop again.
- Lay it horizontally across the front.
- Pull it up one last time through the neck loop.
- Slide it through the front opening and tighten.
Tips:
- Best with spread or cutaway collars.
- Works perfectly with silk or satin ties.
How Long Should Your Tie Be?
- ✅ The tip of the tie should touch or slightly cover your belt buckle.
- Adjust the starting length of the wide end if necessary.
Matching Knots to Shirt Collars
- Spread collars → Full Windsor
- Classic collars → Half Windsor or Full Windsor
- Narrow collars → Four-in-Hand
- Button-down collars → Four-in-Hand
Choosing the Right Fabric
- Silk: Smooth, elegant, works with all knots.
- Cotton: Casual, ideal for Four-in-Hand.
- Wool: Thick, suited for Half or Full Windsor.
- Skinny ties: Best with Four-in-Hand.
Common Mistakes to Avoid
- ❌ Tie too short or too long
- ❌ Crooked or off-center knots
- ❌ Wrinkled fabric under the knot
- ❌ Bulky knots with narrow collars
- ❌ Over-tightening knots
How to Add a Tie Dimple
- Pinch fabric just below the knot before tightening.
- Tighten while maintaining the pinch.
- Smooth sides to keep the crease.
Works especially well with Half Windsor and Full Windsor knots.
How to Untie and Store a Tie
Untying: Reverse the tying steps; avoid pulling the small end forcefully.
Storage: Hang on a tie rack or roll loosely for travel. Avoid stuffing in drawers to prevent wrinkles.
Situational Tie Advice
- Weddings: Full Windsor, silk or satin tie.
- Job Interviews: Half Windsor, solid or subtle patterns.
- School Events: Four-in-Hand, quick and neat.
- Business Meetings: Half or Full Windsor for professional appearance.
- Casual Outings: Four-in-Hand with cotton or knit ties.
FAQs
Q1: What is the easiest way to tie a tie for beginners?
A1: The Four-in-Hand knot is simplest and fastest, ideal for students and first-timers
Q2: Which tie knot is best for formal occasions?
A2: The Full Windsor knot, perfect for weddings, ceremonies, and business events.
Q3: How long should my tie be after tying it?
A3: The tip should touch the top of your belt buckle.
Q4: Can I tie a tie without a mirror?
A4: Yes. Start with the Four-in-Hand knot, easiest by feel.
Q5: What tie knot works best with a spread collar?
A5: Full Windsor fills the space and looks sharp.
Q6: What knot is best for skinny ties?
A6: Four-in-Hand works best for narrow or skinny ties.
Q7: Can teens or kids learn to tie a tie?
A7: Yes, starting with the Four-in-Hand knot is recommended.
Q8: How do I fix a crooked knot?
A8: Uneven starting lengths usually cause this; adjust and retie slowly.
Final Thoughts
Mastering how to tie a tie is about style, confidence, and preparedness. Whether you prefer the Four-in-Hand, Half Windsor, or Full Windsor, the right knot elevates your look. Practice, experiment with fabrics, and try a dimple for a modern touch.
💡 CTA: Try each knot today, find your favorite, and impress at your next event. Share this guide with friends and make sure everyone looks sharp!