Writing a check is a basic yet essential financial skill that everyone should know. Even in today’s digital age of online banking and instant transfers, checks are still widely used for rent, bills, gifts, and professional transactions. Knowing how to properly write a check ensures your payments are secure, accurate, and accepted by banks or recipients.
Whether you’re a student learning personal finance, an adult managing household expenses, or a professional handling business payments, this guide walks you through exactly how to write a check step by step, with practical tips, examples, and safety advice.
Why Writing a Check Still Matters
Even with digital payments becoming common, checks remain relevant because they:
- Provide security: Checks are safer than carrying large sums of cash.
- Create a paper trail: Every payment is recorded for tracking and accountability.
- Ensure universal acceptance: Many landlords, schools, and organizations still prefer checks.
- Show professionalism: A well-written check gives a trustworthy impression.
Learning this skill is not just practical—it also builds financial literacy and confidence.
Understanding the Parts of a Check
Before you start writing, it’s important to understand the different sections:
- Date Line: Write the date you are issuing the check.
- Payee Line: Name of the person or organization receiving the money.
- Amount in Numbers: The payment amount written numerically in the small box.
- Amount in Words: The same payment written in words on the long line to confirm numbers.
- Memo Line (Optional): Note the purpose of the payment, such as “Rent” or “Invoice #1234.”
- Signature Line: Authorizes the payment.
Tip: Understanding these sections prevents mistakes and ensures your check is valid.
Step-by-Step Guide: How to Write a Check
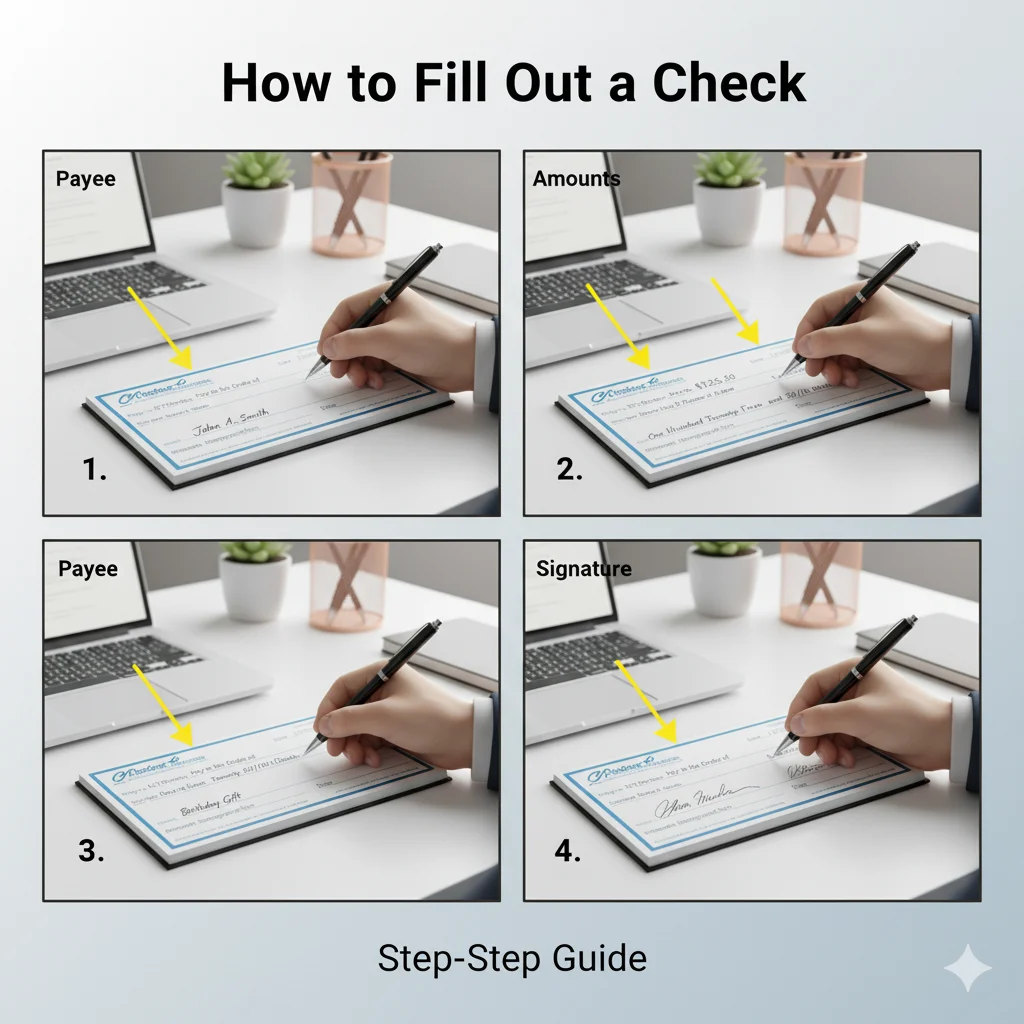
Step 1: Write the Date
Always begin by writing the current date on the top right line. Use the format MM/DD/YYYY or Month Day, Year.
Tip: Avoid post-dating checks unless necessary, and never backdate them.
Step 2: Fill in the Payee
On the line labeled “Pay to the order of,” write the full name of the recipient or company.
Examples:
- John Doe
- ABC Electric Company
Tip: Use the exact legal name to avoid banking errors.
Step 3: Enter the Amount in Numbers
In the small box on the right, write the exact amount of money numerically.
Examples:
- $150.75
- $1,250.00
Tip: Write clearly with no spaces to prevent alterations.
Step 4: Write the Amount in Words
On the long line below the payee name, write the payment amount in words. This confirms the numerical value.
Examples:
- One hundred fifty and 75/100 dollars
- One thousand two hundred fifty and 00/100 dollars
Tip: Draw a line after the written amount to prevent extra numbers from being added.
Step 5: Fill in the Memo Line (Optional)
The memo line helps both you and the recipient track the payment’s purpose.
Examples:
- “Rent for May”
- “Invoice #1234”
- “Birthday Gift”
Tip: Even though it’s optional, filling it can prevent confusion.
Step 6: Sign the Check
Sign on the bottom right line exactly as your bank has your signature on file.
Tip: The check is invalid without your signature. Use a pen for permanence.
Tips for Safe and Accurate Check Writing
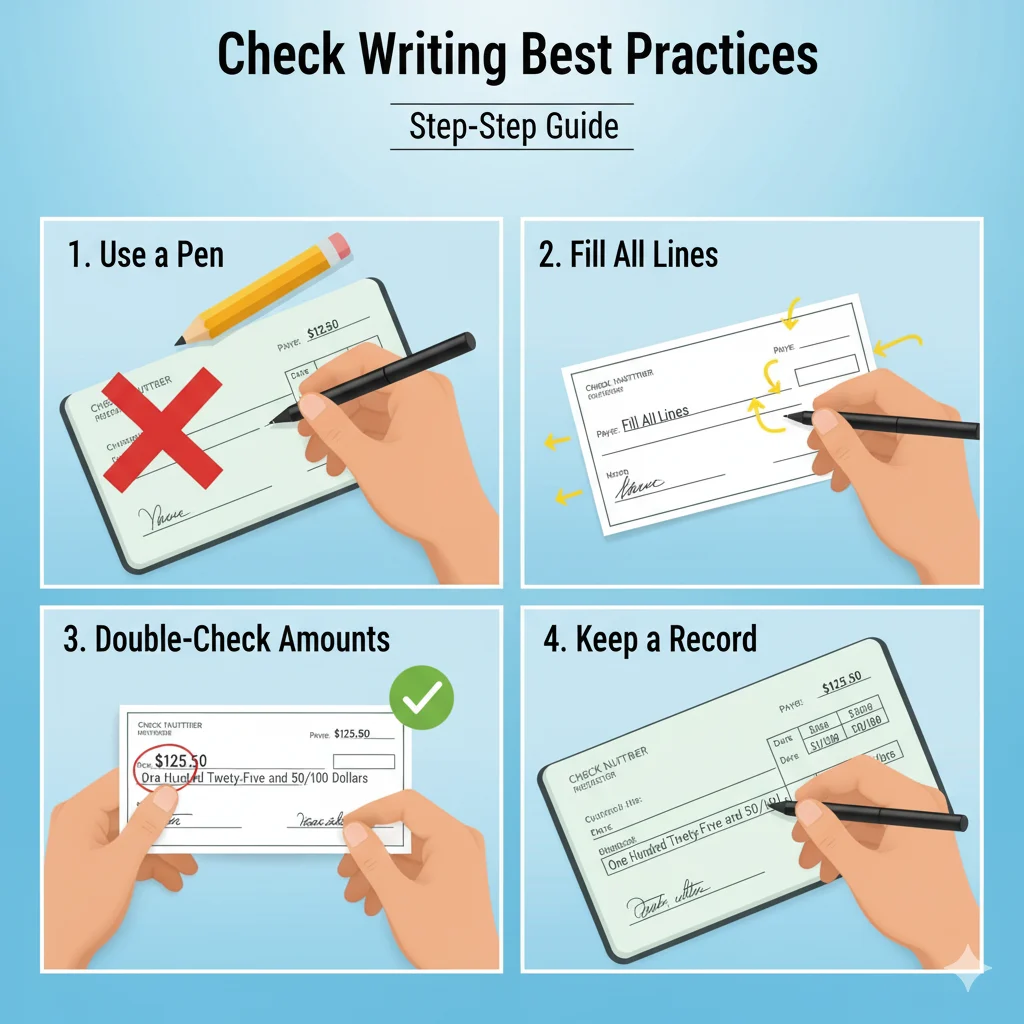
- Always write in pen, not pencil.
- Double-check numbers, payee names, and dates before issuing.
- Avoid leaving blank spaces on the check. Fill lines completely.
- Keep a record of all checks in a check register or logbook.
- Store checks securely to prevent theft or fraud.
Recording Your Checks
Maintaining a check register helps you manage your finances and avoid overdrafts. Include:
- Check number
- Date issued
- Payee name
- Amount
- Purpose
This ensures accountability and helps reconcile your bank statements.
Common Mistakes to Avoid
- Writing wrong numbers or words.
- Forgetting to sign the check.
- Using abbreviations or nicknames for payees.
- Leaving blank spaces that could be altered.
- Misdating or post-dating incorrectly.
Avoiding these mistakes ensures your check is accepted without issues.
How to Write Checks for Different Situations
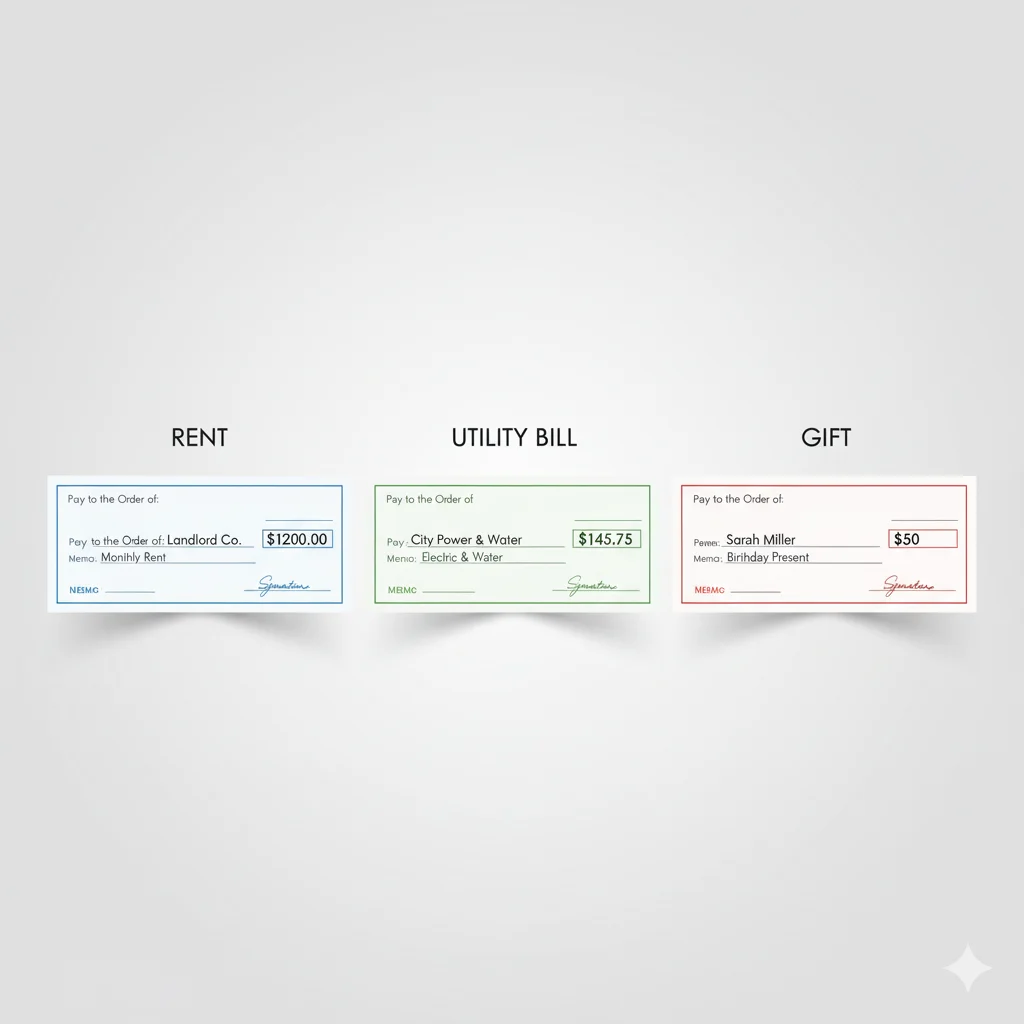
Paying Rent
- Payee: landlord or management company.
- Amount: exact rent in numbers and words.
- Memo: include the rental period.
Paying Bills
- Payee: utility or service company.
- Amount: invoice total.
- Memo: account or invoice number for tracking.
Giving a Gift
- Payee: recipient’s full name.
- Amount: gift value.
- Memo: “Birthday gift” or “Wedding gift.”
Tip: Customizing your memo line helps both you and the recipient keep track of payments.
FAQs
Q1: Can I write a check online instead of physically?
Yes, some banks allow digital check writing, but traditional checks remain widely accepted.
Q2: What if I make a mistake on a check?
Minor errors like crossed-out memos may still be valid. Major mistakes like incorrect amounts or missing signatures require voiding and rewriting.
Q3: How long is a check valid?
Typically 6 months from the date issued, but check with your bank as policies may vary.
Q4: Can I post-date a check?
Yes, but the bank may still process it immediately; inform the recipient.
Q5: What is the memo line for?
To indicate the purpose of the payment for your or the recipient’s records.
Final Thoughts
Writing checks correctly is a critical skill for managing personal and professional finances. Accurate, clear, and secure check writing ensures your payments are processed smoothly.
💡 CTA: Practice writing checks today and share this guide with friends or family who want to improve their financial skills. Keep a log of every check to stay organized and confident.